HAPPY HALLOWEEN!!!
Thursday, October 31, 2013
no tricks, just treats!!!
Friday, October 18, 2013
not-so-scary monster cupcakes
I love to have simple cupcake decorations on hand when I need them. Like today!!!
I have loads and loads of sprinkles and with a couple of royal icing googly eyes you can create some not-so-scary monsters.....
Candy melts squiggled into zig-zags or happy smiles gives each cupcake a little personality.
Happy Birthday Cassius!!!
Sunday, October 13, 2013
elephants & onesies...baby shower cookies
Elephants are a sign of luck and fortune so they were the perfect symbol for baby shower cookies.
The onesie is a given. And since the sex of the baby was undetermined, there were boyish and girly patterns in the mix.
Boy or a girl???
Saturday, October 5, 2013
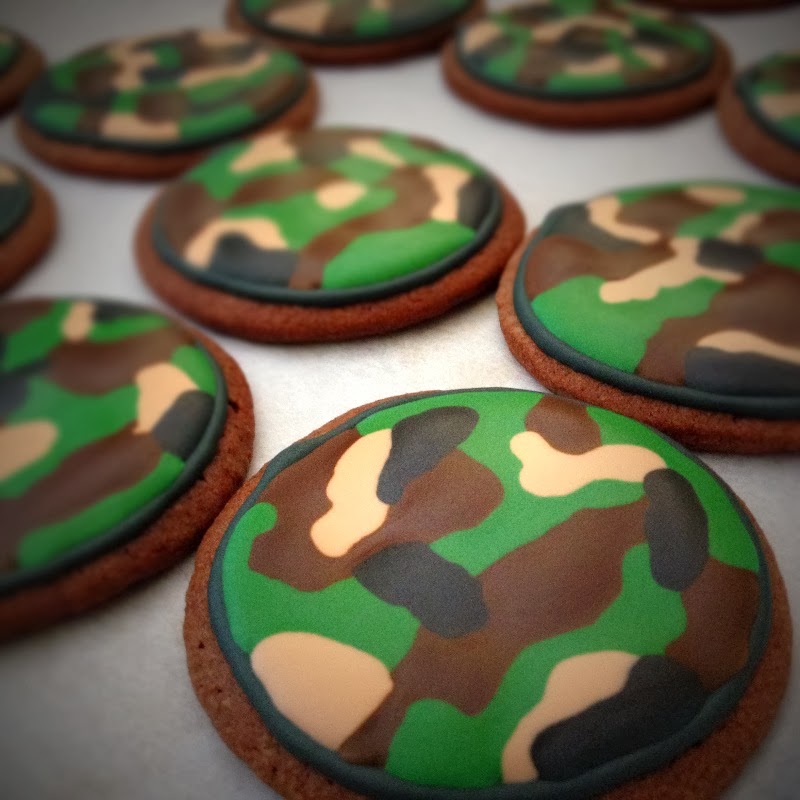
camouflage & u.s. army star cookies & royal icing recipe
I absolutely LOVE anything camouflage and when my cousin asked for Army themed cookies for her son's farewell this weekend, I jumped on the idea and I hope I didn't disappoint.
First I'd like to talk about the royal icing I use for my decorated sugar cookies and for my cupcake toppers.
Royal Icing
6 oz. warm water
5 tablespoons meringue powder
1 teaspoon cream of tartar
2 lbs. powdered sugar
a couple of squeezes of fresh lemon juice
In a bowl of a stand mixer, with a hand whisk, mix your warm water & meringue powder until foamy. Add your cream of tartar and whisk for about 30 seconds. Add your powdered sugar to your foamy mixture, attach the whisk attachment, and begin to mix on low speed until the powdered sugar is absorbed. Increase speed to medium-high and mix your royal icing until it's thick and creamy. Squeeze in some fresh lemon juice and mix thoroughly. At this point you can add more water to create your desired consistency. Thick for flood lines. Thin and runny for filling in. And somewhere in between for detailed work. Hard to describe and you'll just have to experiment with your icing to see how you like it. If you're planning on coloring your royal icing, divide into bowls and squeeze in your food colors. Mix the food coloring well and cover your bowls with either plastic wrap or damp paper towels.
For creating your flood line, I like the icing to be a little thick. That way it doesn't go running off your cookie.
It's best to let your flood line dry at least an hour.
Royal Icing Colors for Camouflage
Brown
Beige
Black
Green
To make the camouflage pattern, pipe random blobs or kidney shapes of one color onto your cookie.
Repeat with another color; connecting shapes and colors together so that the camo pattern forms naturally.
Fill in any gaps with any of the camo colors.....
I was loving every minute decorating these!!!
Last and definitely not least, the U.S. Army star.
I piped a yellow flood line and filled it in white white royal icing. I then piped another yellow line on top of my flood line to give the cookies a little dimension. After the cookies were dry enough to pipe on (roughly 3 - 4 hours), I piped a very thin black line to finish the star.
Sunday, September 29, 2013
multigrain bread
It's feeling like fall in NYC and bread baking weather. So bake some!!!
Labels:
anytime,
bread,
multigrain,
oats,
whole wheat,
yeast
Sunday, September 8, 2013
flax seed muffin in a mug
I've attempted to eat gluten free a couple of times lately, but it's so darn hard!!! Although not eating gluten did give me a little extra energy and I didn't feel bloated as if I had consumed a half a loaf of homemade bread. So eating gluten free is a good thing. But who am I kidding? I'm a baker. I love bread!!! And honestly gluten is what gives bread that awesome chewy texture.
Flax Seed Muffin in a Mug
But if you are sensitive to eating gluten or you just want an easy and healthy breakfast go-to, make this flax seed muffin. There are so many combinations you can mix into this muffin. I suggest mixing in tasty ingredients because frankly the muffin all on it's own is pretty bland.
Flax Seed Muffin in a Mug
adapted from the blog meandjorge
makes 1 muffin
INGREDIENTS
3 tablespoons ground flax seed
1 teaspoon coconut oil ***Veg or olive oil.***
1/2 teaspoon baking powder
1 large egg
Today's mix ins -
2 tablespoons banana - cut into 1/4 inch cubes
1/4 teaspoon vanilla extract
1/8 teaspoon ground cinnamon
2 teaspoons honey
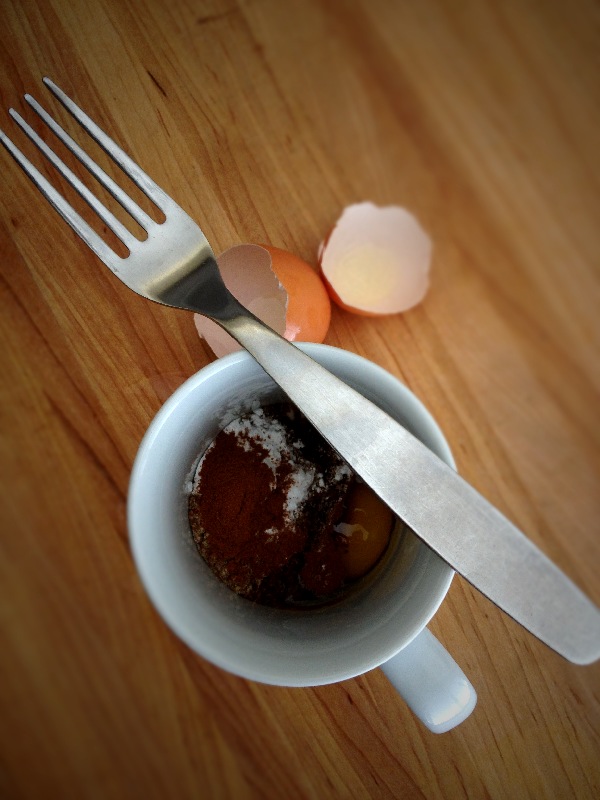
In a coffee mug mix egg, ground flax seed, coconut oil and baking powder with a fork. Making sure all of your baking powder is thoroughly mixed in. At this point you can nuke it as is OR mix in your favorite flavor combinations. Today I used bananas, cinnamon, vanilla and honey.
***Here are some other flavors I'd love to try.***
dried coconut & fresh pineapple
chopped apples & cinnamon
mini chocolate chips & walnuts
peanut or almond butter
raspberry jam & sliced almonds
fresh berries - blueberries, strawberries, blackberries, raspberries
jam or jelly
Nutella
The combinations are endless. Mix in a little of anything you love in a muffin.
Place your mug into your microwave and cook for 1 - 2 minutes. ***The original recipe said to cook for 65 seconds, but I found that with my particular mug (which is narrow and tall), I needed an additional minute. If you're using a more shallow mug, you're probably OK with 65 seconds.***
Invert your muffin and gently coax it out. Even though you aren't greasing your mug ahead of time, the muffin should pop right on out.
Again, this isn't the prettiest thing I've ever made nor is it the tastiest. But you'll be totally satisfied with a healthy and filling breakfast treat.
Tuesday, August 6, 2013
key lime meltaways
These little key lime meltaway cookies DO melt in your mouth. They also have just the right amount sweetness from the dusting of powdered sugar and zing from the copious amounts of key lime zest in them. I imagine that you can turn these into any meltaway flavor by switching the zest and juice to either orange, lemon, even grapefruit or by all means just using everyday limes which are in the original recipe.
I formed my dough into 1-inch diameter logs, so when I sliced my cookies they were about the size of a quarter. Perfect little one-bite bursts of sunshine.
Key Lime Meltaways
adapted from Martha Stewart Living, December/January 1998/1999 and smitten kitchen
makes 6+ dozen quarter-sized cookies
INGREDIENTS
3/4 cup (1-1/2 sticks) unsalted butter @ room temperature
1 cup of confectioners' sugar ***a.k.a. powdered sugar***
finely grated zest of 4 - 6 key limes ***I used 6 because I wanted them to taste lime-y***
2 tablespoons fresh key lime juice
1 tablespoon vanilla extract
1-3/4 cups plus 2 tablespoons all-purpose flour
2 tablespoons cornstarch
1/4 teaspoon salt
DIRECTIONS
In a large bowl, whisk together all-purpose flour, cornstarch, and salt. Set aside.
Cream unsalted butter and 1/3 cup confectioners' sugar together in the bowl of your stand mixer fitted with a whisk attachment or hand held mixer. Mix on medium speed until pale and fluffy. Add the key lime zest, juice, and vanilla. Mix until fully incorporated and fluffy.
Add your flour mixture to your butter mixture and mix on low speed until just combined.
To make these cookies into bite-size, divide the dough into thirds. Place each third onto a piece of 8-inch X 14-inch piece of parchment paper or equivalent. Fold one of the longer ends over the dough. Hold the bottom side of the folded parchment and using a bench scraper or ruler, press and push on the dough that it forms a log approximately 1-inch in diameter and 10 inches long. You should have 3 rolls.
Refrigerate logs until cold and firm, at least 1 hour. ***Cookie logs can also be frozen when you need a burst of sunshine.***
Preheat oven to 350ºF. Remove parchment from logs; cut into 1-1/4 inch thick rounds. On parchment lined cookie sheets, space cookie rounds 1 inch apart. Bake cookies until barely golden, about 13 minutes, rotating halfway through. ***If baking cookie dough straight from freezer, cooking time may be increased an additional 2-3 minutes.***
Transfer cookies to a wire rack to cool for 8 - 10 minutes.
Place the remaining 2/3 cup confections' sugar into a large Ziplock bag. While still warm, gently toss the cookies in the confectioners' sugar until completely dusted.
I formed my dough into 1-inch diameter logs, so when I sliced my cookies they were about the size of a quarter. Perfect little one-bite bursts of sunshine.
Key Lime Meltaways
adapted from Martha Stewart Living, December/January 1998/1999 and smitten kitchen
makes 6+ dozen quarter-sized cookies
INGREDIENTS
3/4 cup (1-1/2 sticks) unsalted butter @ room temperature
1 cup of confectioners' sugar ***a.k.a. powdered sugar***
finely grated zest of 4 - 6 key limes ***I used 6 because I wanted them to taste lime-y***
2 tablespoons fresh key lime juice
1 tablespoon vanilla extract
1-3/4 cups plus 2 tablespoons all-purpose flour
2 tablespoons cornstarch
1/4 teaspoon salt
DIRECTIONS
In a large bowl, whisk together all-purpose flour, cornstarch, and salt. Set aside.
Cream unsalted butter and 1/3 cup confectioners' sugar together in the bowl of your stand mixer fitted with a whisk attachment or hand held mixer. Mix on medium speed until pale and fluffy. Add the key lime zest, juice, and vanilla. Mix until fully incorporated and fluffy.
Add your flour mixture to your butter mixture and mix on low speed until just combined.
To make these cookies into bite-size, divide the dough into thirds. Place each third onto a piece of 8-inch X 14-inch piece of parchment paper or equivalent. Fold one of the longer ends over the dough. Hold the bottom side of the folded parchment and using a bench scraper or ruler, press and push on the dough that it forms a log approximately 1-inch in diameter and 10 inches long. You should have 3 rolls.
Refrigerate logs until cold and firm, at least 1 hour. ***Cookie logs can also be frozen when you need a burst of sunshine.***
Preheat oven to 350ºF. Remove parchment from logs; cut into 1-1/4 inch thick rounds. On parchment lined cookie sheets, space cookie rounds 1 inch apart. Bake cookies until barely golden, about 13 minutes, rotating halfway through. ***If baking cookie dough straight from freezer, cooking time may be increased an additional 2-3 minutes.***
Place the remaining 2/3 cup confections' sugar into a large Ziplock bag. While still warm, gently toss the cookies in the confectioners' sugar until completely dusted.
Cookies can be stored in an airtight container at room temperature up to 2 weeks.
Labels:
anytime,
cookies,
key lime,
martha stewart,
smitten kitchen
Subscribe to:
Posts (Atom)