Showing posts with label fruit. Show all posts

Saturday, November 24, 2012

caramel apple fruit roll-ups

I'm baking my way through a list of nostalgic foods that I loved eating as a kid. Last week it was iced oatmeal cookies and this week it's fruit roll-ups.

My first attempt for making fruit roll-ups was a few weeks ago when we were visiting my husband's family in NoCal. There was a quince tree on their property bearing fruit and it was just begging to be made into something. So fruit roll-ups were made. Making homemade fruit roll-ups are incredibly easy and tasty, it's just another recipe that you have to have a little patience.

A baking note: Don't plan on baking anything in your oven for the next 6 - 8 hours.

Caramel Apple Fruit Roll-Ups
makes 2 baking sheets 

3 - 4 large Granny Smith apples
1/4 cup water/apple juice/apple cider
1 - 3 tablespoons brown sugar (or to taste)
pinch of cinnamon
generous pinch of kosher salt
1/4 teaspoon vanilla extract
squeeze of lemon


You'll also need two rimmed baking sheets and 2 Silpat mats if you have them.

You can also use parchment paper instead of Silpats, but I haven't tried that yet.
Wash and peel your apples.

If your apples are organic and you want a little texture in your roll-ups, leave the skin on.


***Since this was technically my second attempt for making roll-ups, I didn't use organic apples. Ssshhhhh. Don't tell anyone.***


Roughly chop your peeled or unpeeled apples into 1/2 cubes.

Place them into a pot and over medium heat. Add your liquid - water/apple juice/apple cider. Cover and cook until the fruit is soft - about 5 - 7 minutes. You'll know when the fruit is done because it will look like apple sauce. Add your brown sugar and cook a few seconds more to melt the sugar. Remove from heat and stir in your cinnamon, kosher salt, vanilla and lemon. Set aside and cool slightly before blending.

After your mixture has cooled slightly, pour it into a blender or food processor. Blend/blitz until smooth.


Line two rimmed baking sheets with Silpat mats or parchment paper. Using an offset spatula, spread your puree evenly into a thin layer.

Place two racks in your oven evenly spaced (upper and lower thirds) and set to the lowest setting. My lowest setting for my oven was 170°F. 

Place your raw roll-ups into your oven and basically forget about them for the next 4 - 6 hours. Every two hours, rotate your pans for even drying. 


After 6 hours, test your roll-ups by lightly touching the surface. It should be sticky but not raw. Continue baking if needed.

Remove from oven to let cool completely.

Once cooled, place a piece of parchment on top and flip the Silpat mat over. Gently peel mat off of fruit leather. 


At this point it's ready for giving or storing. Roll up your fruit leather and tie with bakers string. Tie several pieces of string on the roll and cut into desired pieces with kitchen scissors.


Friday, August 3, 2012

agua de sandia

I am counting the days until I can escape from New York and soak in the almost perfect SoCal sunshine. Let's face it, August in NY is not pretty. You're not pretty. It's hot. It's humid. Sticky. And just plain gross.


Staying hydrated is super important during these dog days of summer. Water is your number one, but sometimes you want something else. That something else is agua de sandia, also known as watermelon water/juice.


Making your own aguas frescas is so easy! The hardest part is picking out fresh and juicy fruits. When it comes to picking out a watermelon, I cross my fingers and hope for the best.


Since you'll be processing the watermelon in either a blender or food processor, you don't have to worry about buying a seedless watermelon. Although what I thought was "seedless", it wasn't. Mine had a few seeds.....


There isn't really any special way to cut up a watermelon. Simply cut in half, cut into pieces you can handle, cut off the rind and roughly chop up into pieces. You're only interested in the red and juicy flesh. 

INGREDIENTS
a watermelon
lime juice
sugar (optional) or sugar syrup
cold mint tea (optional)

Add about 3 cups of chopped melon to a food processor or blender. Pulse until the melon is completely broken down and is mostly liquid. 

Place a sieve or strainer over a bowl or pitcher and strain out the pulp. Continue with the pulsing and straining process until you have used up all of your fruit.


Now is the time to taste your pure juice. You may want to add a little sugar or even better, sugar syrup and a squirt of lime juice to it. You can also stretch the juice by adding just a little bit of regular water. I instead like to dilute my agua de sandia with cold mint tea.


Sunday, July 29, 2012

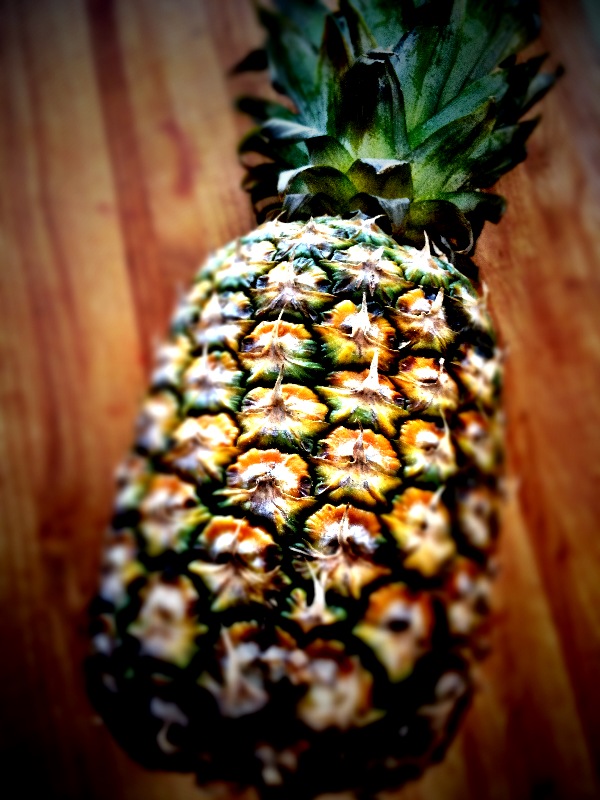
agua de piña & how to cut up a pineapple


Agua de Piña (pineapple water) is what you want to drink if you want to escape to a sunny beach holiday in a glass. And if you live in NYC, this is about as sunny yellow it's going to be in the next few days.....

If you've ever bought this delicious beverage when you're out and about, it can be an outrageous $4.50 or 5 bucks (or more) for a measly 16 ounce plastic cup. Sheesh!!! And in a restaurant? Fuggedaboutit.....You'll probably drop the same $5 on a glass even smaller.

Most aguas frescas have a substantial amount of sugar in them. And they're watered down considerably. My recipe has two ingredients, pineapple and a little bit of water. But before we dive into a glass of sunshine, let's work on cutting up the pineapple.

Picking a ripe pineapple isn't hard at all. Your nose knows! If it smells like a sweet and juicy pineapple, it probably is. Another way is to tug at the pineapple's fronds and if it pulls out easily, it's ripe. Or so "they" say. But if you've bought a pineapple and are not completely sure if it's ripe enough to eat, leave it on your counter top for 1 -2 days. When it's permeating the entire room it's time to cut it up. 

On a clean cutting board, lay your pineapple on it's side. Grab a knife. A serrated knife is best and yes, mine is massive.


Cut off the top fronds and base of pineapple.


Turn your cut pineapple upright so that it's sitting flat on your board. Using your serrated knife, begin to cut off the outer piney skin. Try not to cut off to much of the fruit.


Sometimes your cuts aren't completely clear of "eyes". Just gently slice them off. 


No need to core the pineapple since everything is going into a blender. But if you're planning on eating some of it, you'll need to cut out the core. The core is only good for juicing or gnawing on.


Time to make Agua de Piña!!!


Agua de Piña
makes about 8 cups

INGREDIENTS
1 ripe pineapple - plus core, cut up into chunks
1 - 2 cups water
juice of a lime (optional)
sugar (optional)
***I didn't need to add any sugar to my Agua de Piña, but if you're pineapple isn't that sweet, add a little sugar to taste.***

In a blender or a food processor, blitz about 1/3 of the pineapple and 1/2 cup of water until the fruit is completely pulverized. Place a fine sieve or strainer over a large bowl or pitcher. Gently pour your pulverized fruit into the sieve or strainer. At this time you may need to move around the pulp with a spoon or spatula in the strainer to extract the juice. Once strained, throw away the pulp. Repeat the blending and straining process until you have used up all of your fruit. 


Chill and serve over ice. You can easily turn this into agua de piña colada by substituting the water for coconut water. And add a shot of rum.....you pickin' up what I'm throwin' down???


Agua de piña.....a sunny beach holiday in a glass.....