Sunday, July 29, 2012

agua de piña & how to cut up a pineapple


Agua de Piña (pineapple water) is what you want to drink if you want to escape to a sunny beach holiday in a glass. And if you live in NYC, this is about as sunny yellow it's going to be in the next few days.....

If you've ever bought this delicious beverage when you're out and about, it can be an outrageous $4.50 or 5 bucks (or more) for a measly 16 ounce plastic cup. Sheesh!!! And in a restaurant? Fuggedaboutit.....You'll probably drop the same $5 on a glass even smaller.

Most aguas frescas have a substantial amount of sugar in them. And they're watered down considerably. My recipe has two ingredients, pineapple and a little bit of water. But before we dive into a glass of sunshine, let's work on cutting up the pineapple.

Picking a ripe pineapple isn't hard at all. Your nose knows! If it smells like a sweet and juicy pineapple, it probably is. Another way is to tug at the pineapple's fronds and if it pulls out easily, it's ripe. Or so "they" say. But if you've bought a pineapple and are not completely sure if it's ripe enough to eat, leave it on your counter top for 1 -2 days. When it's permeating the entire room it's time to cut it up. 

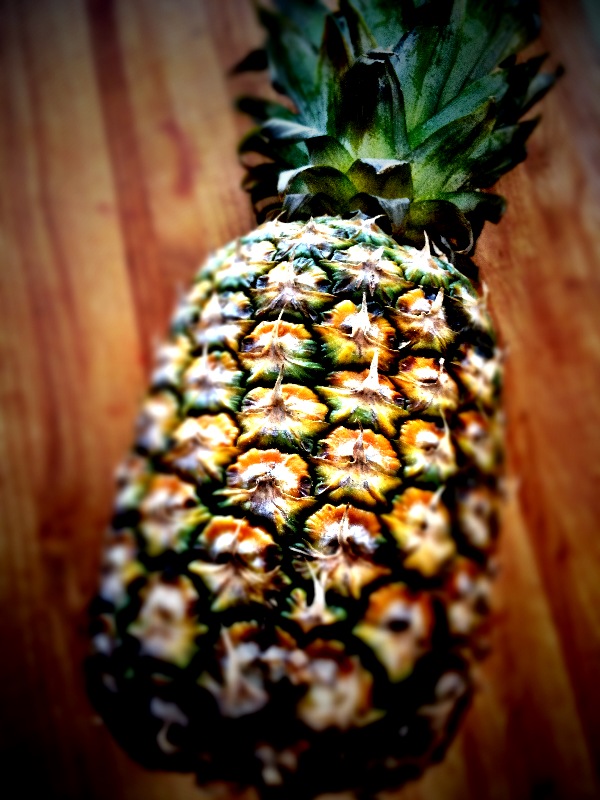
On a clean cutting board, lay your pineapple on it's side. Grab a knife. A serrated knife is best and yes, mine is massive.


Cut off the top fronds and base of pineapple.


Turn your cut pineapple upright so that it's sitting flat on your board. Using your serrated knife, begin to cut off the outer piney skin. Try not to cut off to much of the fruit.


Sometimes your cuts aren't completely clear of "eyes". Just gently slice them off. 


No need to core the pineapple since everything is going into a blender. But if you're planning on eating some of it, you'll need to cut out the core. The core is only good for juicing or gnawing on.


Time to make Agua de Piña!!!


Agua de Piña
makes about 8 cups

INGREDIENTS
1 ripe pineapple - plus core, cut up into chunks
1 - 2 cups water
juice of a lime (optional)
sugar (optional)
***I didn't need to add any sugar to my Agua de Piña, but if you're pineapple isn't that sweet, add a little sugar to taste.***

In a blender or a food processor, blitz about 1/3 of the pineapple and 1/2 cup of water until the fruit is completely pulverized. Place a fine sieve or strainer over a large bowl or pitcher. Gently pour your pulverized fruit into the sieve or strainer. At this time you may need to move around the pulp with a spoon or spatula in the strainer to extract the juice. Once strained, throw away the pulp. Repeat the blending and straining process until you have used up all of your fruit. 


Chill and serve over ice. You can easily turn this into agua de piña colada by substituting the water for coconut water. And add a shot of rum.....you pickin' up what I'm throwin' down???


Agua de piña.....a sunny beach holiday in a glass.....

Thursday, July 26, 2012

chocolate & salted peanut covered frozen bananas

Bananas, dark chocolate, and salted peanuts. What's not to love???


INGREDIENTS
bananas ***Not-too-ripe bananas work best here but if your bananas have a few brown spots on them it's gonna be totally fine.***
chocolate - finely chopped ***I prefer using 70% or more dark chocolate.***
roasted peanuts - roughly chopped ***Salted ones taste best, but if you're trying to cut back on your sodium intake, just make sure your peanuts are roasted for the best flavor.***
honey (optional) ***Dark chocolate is not as sweet as milk or semi-sweet so I add just a little honey for added sweetness and flavor.***
sticks - lollipop or popsicle sticks ***If you don't have any sticks, the next time you're grabbing a cup-o-joe, just snag a few wooden coffee stirrers.***


There are no exact measurements here. Eye ball the amount of chocolate you'll need for the amount of bananas you're using. I melted roughly 1/2 cup of chocolate for one and a half bananas/3 halves. I also added 1 teaspoon of honey for additional sweetness into my melted chocolate. Peanuts??? A handful? 


Peel your bananas, cut them in half, and insert a stick on the cut side. Place on a parchment lined sheet pan and freeze your bananas until frozen. ***I froze mine over night.***


In a heat proof bowl, microwave your chopped chocolate for 30 seconds. Stir. The chocolate will almost be completely melted after 30 seconds. This is optional, but I add a little honey to my chocolate. Nuke for 10 seconds. Stir to combine and set aside with your peanuts.

Pour your melted chocolate into a small glass with a narrow opening so that you can dunk your banana in it. 


Chop your peanuts. ***I like mine roughly chopped.*** Allergic to peanuts??? Substitute toasted chopped walnuts or almonds. Rainbow sprinkles would be awesome too!!!


Dunk your frozen banana into your chocolate, give it a spin and a twirl and roll it into your chopped peanuts.


Place your peanut and chocolate covered bananas back onto your parchment lined sheet and place back into your freezer until the chocolate is set.

Friday, July 20, 2012

thomas the train inspired birthday cookies for dylan


I use my alphabet and number cutters A LOT!!! I love to be inspired by characters, colors, or themes. This time it was Thomas The Train.


Now do you see why I pipe out extra googly eyes???


I know these cookies don't look EXACTLY like Thomas, but I tried to capture his facial expression and use some of his train colors.


Happy Birthday Dylan!!!

You're 3!!!

Thursday, July 12, 2012

happy 1st birthday gio!!!


I've made these Yo Gabba Gabba inspired birthday cookies before here, but I can't help but post about them again because truly they are just too darn cute!!!


When Gio's Mommy told me they were having a Yo Gabba Gabba themed birthday party, I immediately went to work on his birthday cookies.


This little guy may be too young for sugar cookies, but I hope the rest of the family enjoys them.


And a package of cookies are never complete without a Birthday Buddy.


Happy Birthday Gio!!! 
a.k.a. "Boom Boom"!!!

You're 1!!!

Monday, July 9, 2012

royal icing googly eyes

I try not to waste my ingredients. Usually when I've finished decorating a batch of sugar cookies with royal icing, I have a lot left over and I pipe out googly eyes for future cookies/cupcakes.


Just lay down a piece of parchment paper on a clean cookie sheet and pipe away!


Royal icing googly eyes take at least 12 hours to dry. Once dried, peel off the parchment paper and store in an airtight container.


Saturday, July 7, 2012

bridal shower cookie cake favors


The base and middle layers of the cookie cakes were stacked in stacks of two cookies, outlined with white royal icing, and then flooded with pink and orange royal icing.


The top part of the cookie cakes were assembled in the same way, but decorated slightly different.


Once dried, the layers were stacked like little cakes.


The cookie cakes were individually wrapped and tied with natural baker's string. A perfect favor for a vintage-themed bridal shower.


CONGRATULATIONS Gannika & Christopher!!!


This photo was sent to me from the Bride-To-Be yesterday.....