Monday, February 13, 2012

cocoa brownies - recipe #6 of 7 days of sweets

Brownies out-of-a-box are SO easy to make so why bake them from scratch??? Well, these brownies are just as easy and delicious and you will thank me, the sophisticated gourmet and many others for sharing this recipe. Apparently these brownies have been all over the internet for quite some time. Where have I been? Under a rock because there is no way that something this good and easy goes under my nose without recognition. PS.....You're in for a minor workout and a major reward.


Best Cocoa Brownies
taken from the sophisticated gourmet via Alice Medrich's Bittersweet via Epicurious


10 tablespoons (1 1/4 sticks) unsalted butter, cut into 10 slices
1 1/4 cups natural cane sugar or granulated sugar
3/4 plus 2 tablespoons (82 grams) cocoa powder ***I use the darkest, richest, highest quality Valrhona cocoa powder but any cocoa powder will taste just fine. You can also do a combination of cocoa powders. The pic below has a combo of Valrhona and organic Dutch processed cocoa powders.***
1 1/4 teaspoon fine grain sea salt ***Do not use regular table salt. But if that's all you got, reduce the amount to 3/4 teaspoon table salt***
1/2 teaspoon vanilla extract 
2 large eggs, cold
1/2 cup (62 grams) whole wheat pastry flour, whole wheat flour, or all-purpose flour ***I used regular whole wheat flour***
2/3 cup toasted walnuts or pecans optional


Position rack in UPPER THIRD of your oven and preheat to 325°. Line bottom and sides of a 8 x 8 baking pan.


In a microwave safe bowl, melt butter. Add sugar, cocoa powder and salt. Mix with a wooden spoon or spatula. Mixture should be warm.


Stir in vanilla extract. Add COLD eggs one at a time. Stirring vigorously. When mixture is thick, shiny, well blended and smooth, add flour all at once. Stir until you can't see any flour, then beat vigorously for 40 strokes. 


***Yes, 40 stokes!!! A pre-workout before consumption. 40 vigorous strokes is almost impossible (but can be done, just use your muscles) because the batter gets super thick. I haven't tried this, but using your Kitchen Aid stand mixer fitted with a paddle attachment for the mixing process may make "beating vigorously" a lot easier****** 


Stir in nuts, if using. Spread out into pan.


Bake 20 - 30 minutes until toothpick inserted into center comes out slightly moist. ***All ovens are different. I baked my brownies for 35 - 40 minutes** Cool completely in pan. 


Carefully remove brownies from pan and remove parchment paper. Cut into squares or for Valentine's Day, use a heart shaped cutter.


Saturday, February 11, 2012

valentine's day sugar cookies - decorating tips & #5 of 7 days of sweets

It's the weekend before Valentine's Day so you have plenty of time to make your special someone something sweet. I know decorating sugar cookies may not be the easiest thing to make, but practice makes perfect and even I need to practice.


I make sugar cookies quite often, but today I thought I'd share my steps for decorating them.....


After all of my cookies have cooled completely, I place them on clean parchment lined baking sheets. 


Once I have filled my pastry bag with royal icing, I place it in a pint glass with a damp paper towel at the bottom of the glass. This helps the icing tip from drying out. I also fold over my filled pastry bag and clip it with a binder clip. That way nothing oozes out. 


Next, carefully outline all of your cookies. This outline is very important because you don't want your royal icing going everywhere. Let this dry for at least an hour.


I like to stack my baking sheets of cookies while the icing dries because frankly my kitchen isn't THAT big. Obviously don't stack the pans right on top of each other. Alternate long and short sides.

While the outline dries, I gather the rest of the things I need - tinted icing, toothpicks, and a damp paper towel. The icing used to fill-in the cookies needs to be thinned down with water. Too stiff and it will not dry smoothly. 


I keep my royal icing covered with a damp paper towel. Otherwise it will form a skin and dry out. If you're afraid of just "spooning" in the icing, you might want to consider using a piping bag to fill your cookies.


The toothpicks are used to "drag" the icing towards the outline. Super important that the outline is completely dry or else you'll end up with a mess. Wiping off the toothpick on the damp towel helps. If not, the icing builds up, gets crusty, and if you keep using it you'll end up with dried icing bits in and on your cookies. 

Using your original piping bag filled with icing, you can create your designs. I like to stick with easy designs like dots, stripes/plaid, marble/swirl and hearts.


To make a "heart" pattern, while the icing is still wet drop in a few dots. With the tip of your toothpick, start at the top of the dot and gently drag it downwards through the icing. If this doesn't work on your first try, no worries. Just take your toothpick and drag it through all of the dots. This will create a marble/swirl pattern.


If this doesn't scream Valentine's Day, I don't know what does.....


 Hugs and kisses??? Yes, please!!!


OK, if decorating cookies isn't your deal, you can head down to Park Delicatessen in Brooklyn where they are selling my cookies along with the cutest flower arrangements and gifts for Vday!!!

Friday, February 10, 2012

faux oreos - recipe #4 of 7 days of sweets

I'm a freak about "faux" foods and when I find a recipe that sounds like the real deal, I make it immediately. Like faux Oreos.....The original reipe is from one of my favorite blogs, Serious Eats, and back in December they featured these in a peppermint holiday version. I'm sticking with the original.


For Valentine's Day, cut the chocolate cookies out with a heart cutter and tint the white filling pink. Wish I thought of that when I was making these......


Fauxreos
borrowed from the blog Serious Eats 


INGREDIENTS
3 ounces unsalted butter, room temperature
3 3/4 ounces sugar
1 1/2 ounces brown sugar
1 1/2 teaspoons salt
1/4 plus 1/8 teaspoons baking powder
1/4 teaspoon baking soda
1 1/2 teaspoons vanilla extract
2 egg yolks
4 ounces all purpose flour, sifted
3 ounces cocoa powder, sifted
 
FOR THE FILLING
from Martha Stewart
4 tablespoons (1/2 stick) unsalted butter, room temperature
1 1/2 cups confectioners' sugar
1/4 cup granulated sugar

pinch of salt
2 teaspoons vanilla extract


TO MAKE THE CHOCOLATE COOKIES Using a hand or stand mixer set to medium speed, cream together butter, both sugars, salt baking powder, baking soda, and vanilla extract until combined. With mixer still running, add in egg yolks one at a time. Once incorporated, shut off mixer and scrape bowl down with a rubber spatula.


Turn mixer to its lowest setting. Dump in flour and cocoa all at once. The mixture will be stiff. Continue mixing until uniform. Shut off mixer. Use a spatula to scrape the dough from the bowl and knead lightly to form a smooth ball. Use your hands to flatten into a disc.
***You may begin rolling the dough right away, or you may wrap it with plastic and refrigerate for up to a week.
***If you've kept the dough refrigerated, let it sit at room temperature to soften before starting to roll.
Preheat oven to 350° F. Sift some cocoa powder onto the counter (using cocoa instead of flour gives the Fauxreos their uniquely dark color). Use a rolling pin to roll the dough to 1/8" thickness (as thick as 3 dimes, stacked).
When finished, slide a metal spatula between the dough and counter to loosen. This will prevent the cookies from sticking.
A 2" round cutter makes perfect "Oreos" but use any cutter you like. Cut out the cookies and use a metal spatula to lift and transfer to cookie sheet.
Arrange cookies on a parchment lined baking sheet. The cookies will not spread during baking, so they may be arranged quite close together. Set the sheets aside.
Gather up, knead, and re-roll the remaining dough scraps, likewise cutting and arranging on a cookie sheet.
Bake for about 12 minutes, or until quite firm to the touch. If your oven has an uneven heating element, rotate the cookie sheets after six minutes. Once the cookies have baked, cool thoroughly, directly on the cooling rack.
TO MAKE THE FILLING In a large bowl, using an electric mixer, beat butter until light and fluffy. Gradually add confectioners' sugar, granulated sugar and pinch of salt, beating until combined. Beat in vanilla extract.
Using a spatula, transfer half the filling to a small pastry bag fitted with a plain tip. Alternately you can use a Ziploc bag with the corner snipped off as a makeshift pastry bag. ***I found this filling to be a little "stiff". I just spooned small amounts onto my cookies.***

TO ASSEMBLE THE COOKIES Flip half of the wafers upside down. Onto each, pipe or spoon vanilla filling. Place a cookie on top and press down with your fingers, applying very even pressure so the filling will spread uniformly across the cookie. 

Transfer cookies to an airtight container and refrigerate for a couple of hours. Refrigerating the cookies will solidify the filling and bonding it with the chocolate cookies. 


***My apologies for the weight measurements. If you don't have a scale, I'm sure there is somewhere on the web to convert. If not, drop me a comment and I will send you the measurements. Sorry!!!***


Wednesday, February 8, 2012

peanut butter chocolate chip cookies - recipe #3 of 7 days of sweets

If you live in NYC you are surrounded by famous and not-so-famous bakeries, restaurants with a bakery attached, and corner bodegas that also tap into the "homemade" sweet treat. I bake on a regular basis (obviously) but I do try and sample the best of the best or attempt to make the best in my very own kitchen. Now this recipe was introduced to me by my good friend who is also a baker and I trusted her taste palette and gave these peanut butter chocolate chip cookies a go.....


I have a couple of friends with nut allergies but I feel most like or love peanut butter cookies. Add some chocolate and it's a win win situation. This recipe for peanut butter chocolate chip cookies comes from one of my favorite food blogs, Smitten Kitchen via Magnolia Bakery Cookbook. 

Peanut Butter Chocolate Chip Cookies
via Smitten Kitchen and Magnolia Bakery Cookbook

INGREDIENTS
1 1/4 cups all-purpose flour
3/4 teaspoon baking soda
1/2 teaspoon baking powder
1/4 teaspoon salt
1/2 cup unsalted butter, softened
1 cup peanut butter, at room temperature ***I used Trader Joe's Organic Chunky Peanut Butter***
3/4 cup sugar
1/2 cup firmly packed brown sugar
1 large egg, at room temperature
1 tablespoon milk
1 teaspoon vanilla extract
1/2 cup peanut butter chips
1/2 cup chocolate chips ***I didn't have any chocolate chips but I chopped up chunks from my Pound Plus Trader Joe's Dark Chocolate bar. I'd also recommend bittersweet chocolate chips instead of semi-sweet.***

1 - 2 tablespoons sugar for rolling

Preheat oven to 350˚F. Line 2 baking sheets with parchment paper.

In a bowl, combine the flour, baking soda, baking powder and salt. 

In a large bowl, beat the butter and peanut butter together until fluffy. ***This can be done in a stand mixer with a paddle attachment, a hand held mixer, or with a wooden spoon and your own muscles. *** Add both of the sugars and beat until smooth. Add the egg and mix well. Add the milk and vanilla extract. Add the flour mixture and mix thoroughly. Stir in the peanut butter chips and chocolate chips/ chunks.

Place remaining 1 -2 tablespoons of sugar in a shallow dish or plate. Drop by rounded teaspoonfuls into the sugar and roll around to coat. ***I used a 1-ounce cookie scoop.*** Place onto prepared baking sheets, leaving a few inches between for expansion. ***BTW....If you're using a 1-ounce scoop, this recipe will yield 3 dozen cookies.....***


Using a fork, lightly indent with a criss-cross pattern but do not overly flatten cookies. ***Smitten Kitchen used a small offset spatula to keep it smooth on top and so did I.***


Bake for 10 to 12 minutes. ***11 minutes was just perfect.*** Do not overbake. Cookies will appear to be underdone, but they're not. Cool the cookies on the sheets for 1 minute, then remove to a wire rack and cool completely. ***I sometimes bake two sheets of cookies at a time, but since this was my first time baking these cookies, I baked one sheet at a time on the middle rack of my oven.***


If you or your sweetheart love crispy on the outside and chewy on the inside peanut butter chocolate chip cookies, then make these for Valentine's Day. Who needs a box of chocolates anyway.....

Tuesday, February 7, 2012

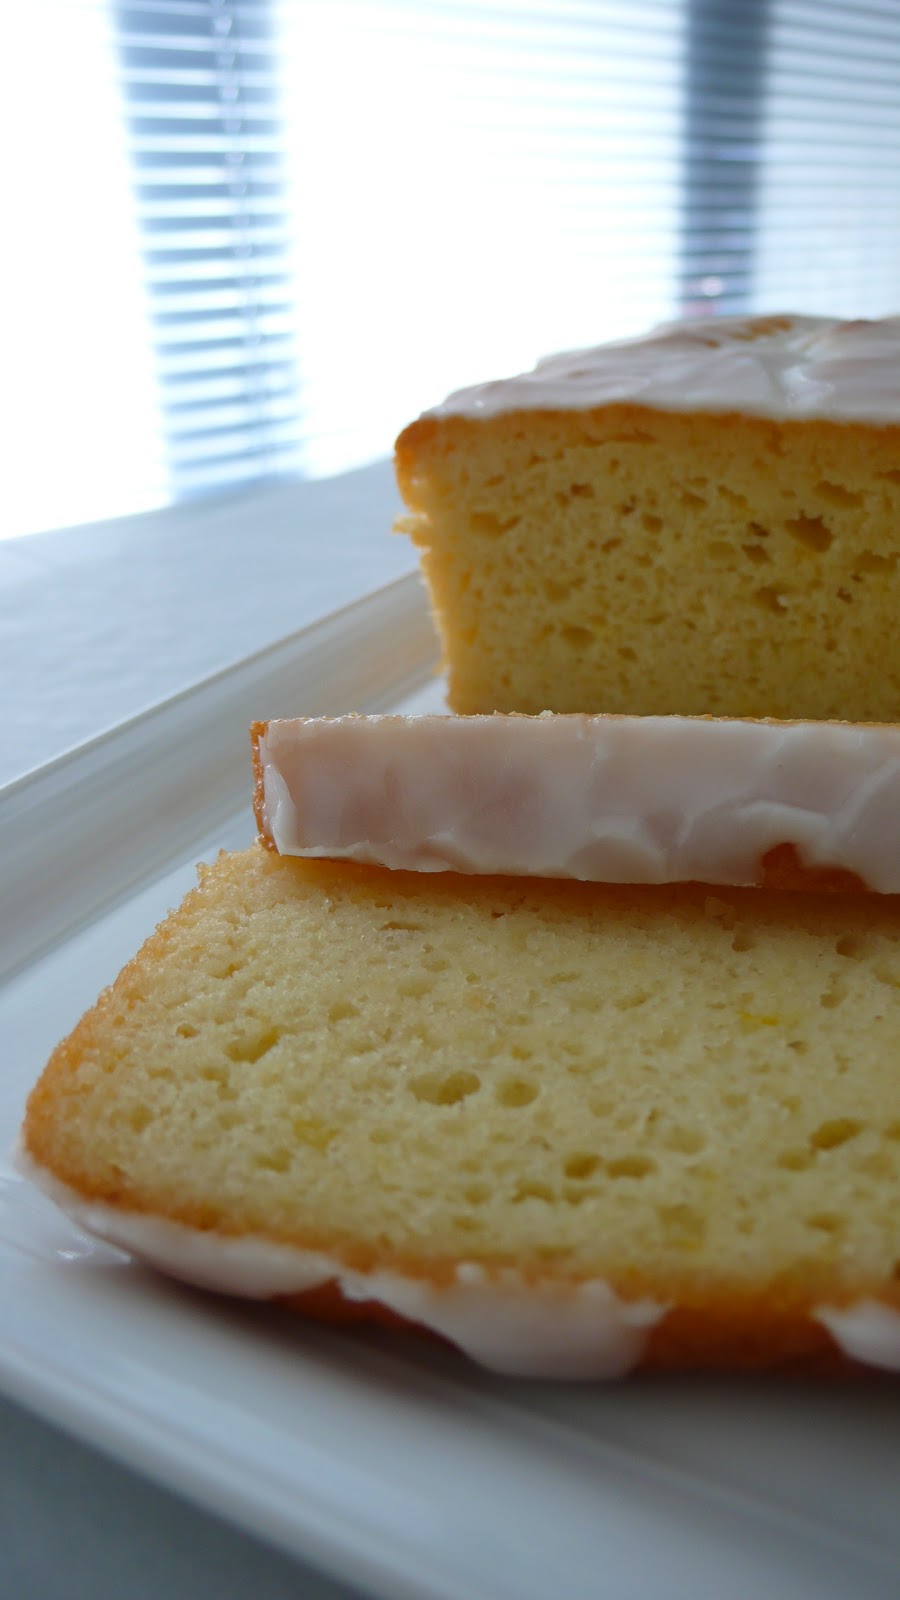
lemon yogurt cake - recipe #2 of 7 days of sweets

I know lemon yogurt cake doesn't scream Valentine's Day, but this cake is SO good and easy to make, why not bake your sweetie a cake filled with sunshine. Lemons make their way into the cake, in the soak, AND in the sugary glaze on top. It's perfect for breakfast, an afternoon snack, or for a Valentine's Day dessert drizzled with red raspberry sauce. 


A couple of weeks back, I blogged about Meyer lemons and made Meyer lemon meringue tarts. And since I still had a few Meyer lemons left from smuggling them back from CA, I couldn't resist using them in this cake. 


This is another one of those recipes that I have had for years! It has fallen off my baking radar, but after today, I will bump it up to one of my faves.


Lemon Yogurt Cake
Taken from Barefoot Contessa At Home 2006 and adapted to my own taste


INGREDIENTS
1 1/2 cups all-purpose flour
2 teaspoons baking powder
1/2 teaspoon kosher salt
1 cup whole-milk yogurt ***I used low fat yogurt and it seemed to be fine***
1 cup sugar ***Since there is sugar in the glaze/soak and in the glaze topping, I reduced the amount of sugar to a scant 3/4 cup***
3 extra large eggs ***Extra large eggs? Who buys extra large eggs? Most recipes call for large eggs and I used the largest ones from my dozen for this cake***
2 teaspoons grated lemon zest (2 lemons)
1/2 teaspoon pure vanilla extract
1/2 cup vegetable oil
1/3 cup freshly squeezed lemon juice
1/3 cup sugar


FOR THE TOPPING
1 cup confectioners' sugar
2 tablespoons freshly squeezed lemon juice


DIRECTIONS
Preheat the oven to 350˚F. Grease an 8 1/2 by 4 1/4 by 2 1/2-inch loaf pan. Line the bottom with parchment paper. Grease and flour pan.

Sift together the flour, baking powder, and salt into a bowl. In large bowl, whisk together the yogurt, 1 cup (or less) of sugar, the eggs, lemon zest, and vanilla. Slowly whisk the dry ingredients into the wet ingredients. With a rubber spatula, fold the vegetable oil into the batter, making sure it's all incorporated. Pour the batter into the prepared pan and bake for about 50 minutes, or until a cake tester placed in the center of the loaf comes out clean.

Meanwhile, cook the 1/3 cup lemon juice and remaining 1/3 cup sugar in a small pan until the sugar dissolves and the mixture is clear. Set aside.

When the cake is done, allow it to cool in the pan for 10 minutes. Carefully remove cake from pan and place on a baking rack over a parchment lined baking sheet. ***This next step is not in the original recipe but if want your cake to soak up the lemon syrup, I suggest you do this.....With a wooden skewer, pokes holes all over top of cake*** While the cake is still warm, pour the lemon-sugar mixture over the cake and allow it to soak in. ***I gently spooned the syrup on top making sure the cake absorbed as much as it could*** Cool.


Once your cake is completely cooled, combine the confectioners' sugar and lemon juice and drizzle it all over the cake. 
***The lemon glaze on top of this cake forms a slight crust but never gets completely hard.***


Monday, February 6, 2012

torie's cherry chocolate chunk cookies - recipe #1 of 7 days of sweets

Valentine's Day is a week away and I'm honoring it by making a week's worth of sweets. On this particular day, it doesn't always mean giving your sweetie a heart shaped box of chocolates or a dozen red roses. Cupcakes, cookies, brownies or anything "sweet" are also things that can say, "I love you."


Pre-pastry school, Torie's Cherry Chocolate Chunk Cookies used to be my go-to recipe when I wanted to say "thank you", "I love you", or just because. This cookie has everything-but-the-kitchen- sink in it and I'm usually not a fan of dried fruit in baked goods but for some reason it really works here. 


I have an enormous collection of sweet and savory recipes. Mainly sweet ones of course. This recipe used to be at the top of my baking list and as of this weekend, I probably hadn't made them in over five years. What a shame.....


This recipe is pretty straight forward. There isn't anything fancy in the mixing method and you should be able to find most or all of the ingredients at your local grocery store.


Torie's Cherry Chocolate Chunk Cookies
The Martha Stewart Show 2009 


INGREDIENTS
1 1/2 cups all-purpose flour
1 teaspoon baking soda
1/2 pound (2 sticks) unsalted butter, room temperature
3/4 cup light brown sugar, packed
3/4 cup sugar
1 large egg
1 teaspoon pure vanilla extract
1 1/2 cups oats ***Whole rolled oats. Not quick cooking oats***
1 cup dried cherries ***I buy Trader Joe's Dried Pitted Tart Montmorency Cherries***
4 1/2 ounces bittersweet chocolate, coarsely chopped ***In a pinch, chips are fine but make sure they're bittersweet and NOT semi-sweet because you don't want to add any more sweetness***
1 cup toffee pieces  ***These are Hershey's Heath English Toffee Bits. If your grocery store doesn't have them they're available on Amazon.***


DIRECTIONS
Preheat oven to 350˚F. Line two baking sheets with parchment paper; set aside. In a bowl, sift together flour and baking soda. 

In the bowl of an electric mixer fitted with the paddle attachment, cream the butter and both sugars on medium speed until light and fluffy, 2 to 3 minutes, scraping down the sides of the bowl ounce or twice during mixing. Add the egg; mix on high to combine. Add the vanilla; mix to combine. Scrape down the sides of bowl.

Add the flour mixture and mix on low speed until well combined. Add the oats, cherries, chocolate, and toffee pieces; mix to combine after each addition. ***I usually mix the oats, cherries, chocolate chunks and toffee bits together in a separate bowl and add them in all at once.***

Spoon a heaping tablespoon of dough onto a lined baking sheet. ***You can use a cookie scoop here. I like these jumbo-size, so I use a 2 ounce scoop.*** Repeat, spacing 2 inches or more apart depending on the size of your cookies.

Bake cookies until golden brown, 14 to 16 minutes, rotating baking sheet halfway through. ***The jumbo cookies I baked baked for 16 minutes. The cookies will appear "raw" in the middle. Leave on the baking sheet for a few minutes so that they will finish baking. *** Transfer to a wire rack to cool. 

Store in an airtight container up to 2 days.
 ***I honestly think these cookies have a longer life than 2 days. If your container is super airtight, you may be able to stretch their life to up to 5 days.***


Wednesday, February 1, 2012

toasted almond scones

It's February 1st and it feels strangely like spring is in the air. The norm would be freezing cold and snowy, but today's forecast is a crazy high of 60˚F and a chance of a shower.


I'm meeting up with some of my bestest girlfriends this morning for a play date with their kids. I of course will be flying solo but will have toasted almond scones in tow.....


These scones have a quadruple threat of almond in them: ground toasted almonds, chopped toasted almonds, almond extract and sliced almonds sprinkled on top. I spooned raspberry jam in the middle of half of them because I just love a combo with almond and raspberry.


Toasted Almond Scones
taken from the app Baking with Dorie
Makes 12 scones


INGREDIENTS
1 cup blanched toasted almonds (whole, slivered, or sliced)
2 tablespoons of sugar
1 large egg
1/3 cup heavy cream
1/4 cup milk
1/8 teaspoon almond extract
1 3/4 cup all-purpose flour
1 tablespoon baking powder (double-acting)
1/4 teaspoon salt
1 stick of unsalted butter (chilled and cut into small pieces)
1/4 cup sliced almonds (optional)
2 - 4 tablespoons of raspberry jam (optional)


Center a rack in the oven and preheat the oven to 400˚F.


Line a baking sheet with parchment paper or a silicone baking mat.


Divide the toasted almonds in half. Finely grind 1/2 cup in a food processor or blender with a generous pinch of sugar, taking care not to over grind the nuts and end up with almond butter. Finely chop the other 1/2 cup.


Whisk the flour, ground almonds, remaining sugar, chopped almonds, baking powder, and salt in a large bowl. Set aside. ***Or pulse a couple of times in your food processor***


Stir together egg, heavy cream, milk, and almond extract. Set aside.


Drop the 1 stick of butter into your flour mixture and using your fingers, toss to coat the pieces of butter with flour. ***Since my food processor was already being used, I dumped my flour mixture back in and then I dropped my butter cubes right on top*** Quickly, working with your fingertips or a pastry blender, cut and rub the butter into the dry ingredients until the mixture is pebbly. ***Or if using your food processor, give the butter and flour mixture a few pulses. There should be big and little "pebbles" of butter throughout*** 


Pour the liquid ingredients over the dry ingredients and stir with a fork just until the dough., which will be wet and sticky, comes together. ***I poured my wet ingredients over the dry ingredients and pulsed a few times until the dough came together slightly. Be careful not to over process***


Still in bowl, gently knead the dough by hand or turn it with a rubber spatula 8 to 10 times. ***I lightly floured my surface, turned the dough out, and gently gathered it together***


Turn the dough out onto a lightly floured work surface and divide in half. Working with one piece at a time, pat the dough into a rough circle that's about 5 inches in diameter, cut into 6 wedges and top each scone with a few sliced almonds, if you're using them. (At this point, the scones can be frozen on the baking sheet, then wrapped airtight. Don't defrost before baking - just add 2 minutes to the baking time.)


***If you want to add raspberry jam to them, gently press your thumb into the middle of each scone and spoon a heaping teaspoon into the indentation. You can also sprinkle with sliced almonds too!***


Place the scones on to your prepared baking sheet and bake for 20 - 22 minutes or until their tops are golden brown. Transfer the scones to a wire rack and cool to room temperature.