Saturday, April 14, 2012

s'mores & homemade marshmallows

So I was all pumped to make homemade Peeps last Easter weekend but it wasn't as easy as I thought it would be. Instead I turned my ooey-gooey marshmallows into s'mores. Yum!!!

S'mores

marshmallows (store bought or homemade)
chocolate
graham crackers

Snap your graham crackers in half, grab a clean unlined baking sheet and lay out your graham crackers. In the meantime, place an oven rack at the highest notch in your oven and set it to high broil.

Make as many as you want. Sadly I'm only making four. 
Place into oven. Don't walk away. Just hang out and stare into your oven because the marshmallows brown pretty fast. Once they have browned to your liking, take them out.

They go from this.....

to this.....

In seconds.


Sandwich the gooey halves together and enjoy!

Homemade (Toasted Coconut) Marshmallows
recipe from Food Network's Ina Garten

My heart was set on making marshmallows Peeps and toasted coconut marshmallows last weekend, but cutting out marshmallow Peeps with a bunny shaped cookie cutter just wasn't cuttin' it. At least my original plan for toasted coconut marshmallows came through.....

INGREDIENTS


  • 3 packages unflavored gelatin
  • 1 1/2 cups granulated sugar
  • 1 cup light corn syrup
  • 1/4 teaspoon kosher salt
  • 1 tablespoon pure vanilla extract
  • Confectioners' sugar, for dusting
  • 3 - 4 ounces sweetened coconut, toasted

DIRECTIONS
Combine the gelatin and 1/2 cup of cold water in the bowl of an electric mixer fitted with the whisk attachment and allow to sit while you make the syrup. Toast your coconut in a dry pan over medium heat. The coconut toasts quickly, so watch it carefully. Once toasted, set aside.

Meanwhile, combine the sugar, corn syrup, salt, and 1/2 cup water in a small saucepan and cook over medium heat until the sugar dissolves. Raise the heat to high and cook until the syrup reaches 240 degrees on a candy thermometer. Remove from the heat.


With the mixer on low speed, slowly pour the sugar syrup into the dissolved gelatin. Put the mixer on high speed and whip until the mixture is very thick, about 15 minutes. Add the vanilla and mix thoroughly.


***Before I did the following steps, I greased my pan lightly with vegetable oil - a light spray or wipe with a paper towel. That way the confectioners' sugar and coconut stuck to the dish a little bit.*** With a sieve, generously dust an 8 by 8-inch nonmetal dish with confectioners' sugar and sprinkle half of the toasted coconut in another 8 by 8-inch nonmetal pan. ***I used my metal baking pans and it seemed to work out perfectly.***

Pour the marshmallow mixture into the pan, smooth the top with damp hands, and dust with more confectioners' sugar and sprinkle with more toasted coconut. Allow to stand uncovered overnight until it dries out.

PS.....This stuff is super sticky and stringy!!! You may not get all of it our of your bowl. Don't worry, you'll yield more than enough marshmallows.

Run your pairing knife or small offset spatula around the edges of your pans. Turn the marshmallows onto a board and cut them in squares. ***I find using a pizza wheel cutter works best.*** Dust them with more confectioners' sugar for plain marshmallows and/or roll in more toasted coconut for toasted coconut ones. 

Thursday, April 12, 2012

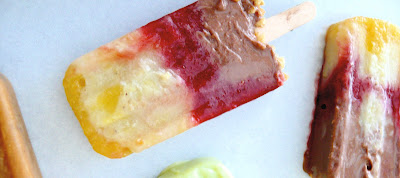
experimenting with popsicles.....

The temperature in NYC is supposed to heat up this weekend around the 70s which means it's getting close to popsicle eating kind of weather.


You can pretty much turn any liquid into a frozen treat.....I chose several types of liquids.....


Strawberry shortcake anyone??? In case you haven't noticed, I even sprinkled chunks of shortbread cookies on to the bottom of the bars. The shortbread softened a bit in the freezer which made the texture like "cake". Just like strawberry shortcake.

A banana split bar??? Pineapple, strawberries, bananas, chocolate and salty peanuts??? Who wouldn't want this combination on a stick???

Now this next flavor is a little strange for most.....Creamy avocado. I know, weird right? Well, it's not so weird to me because I've eaten avocado ice cream before and maybe you have too. It's actually pretty good.....

This bright orange bar is a Thai iced tea bar.....Now THAT'S something I want to eat on a hot spring or summer day!!!


***Hey folks!!! I'll be experimenting with more crazy flavors!!! Leave a comment or post on my Facebook wall your favorite kind of popsicle OR a flavor combo you want me to try.!!!

Monday, April 9, 2012

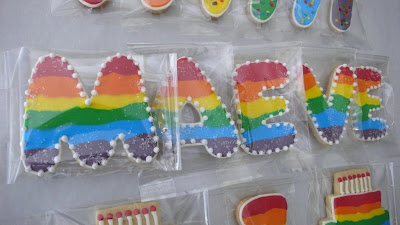
somewhere over a rainbow birthday.....


I know that this little girl LOVES to draw rainbows....


And eat birthday cookies!!!


You're 7 !!!

HAPPY BIRTHDAY MAEVE !!!

Saturday, April 7, 2012

an easter egg hunt in brooklyn.....

I just LOVE Easter!!! But I think I love it most because of the candy....I'm not gonna lie. :)  And since my husband and I don't have little ones of our own, we tacked on to our best friends and their kids this Easter holiday. 

So.....Easter candy was NOT in these kid's baskets but instead we hid Cheddar Bunnies, organic gummy bears, vitamin C organic lollipops, squishy apple sauce packets, and of course homemade Easter cookies made by yours' truly. 


I used strips of pink streamers, paper cut-outs, and colorful Post It notes to decorate "the goods". 


To lure the Easter Bunny into their home, we set out some carrots along with their Easter baskets.


When you live in the NYC, or in this case Brooklyn, you don't have the luxury of a grassy yard to hide Easter eggs and such.....


Sometimes you just have to be creative with your hiding spots.....


 This is obviously where a carrot would grow, right???


And sometimes you find places that are not as obvious.....


This was not staged. These cuties were already sitting there and my cookie just blended right in.


Nibbled on carrots were proof that the Easter Bunny was here and a reminder to 
EAT SUPER FOODS!!!

HAPPY EASTER!!!


Tuesday, April 3, 2012

oat & maple syrup scones


I have been on a scone binge lately and this is the second kind of scones I've made in the past few days. Don't worry, the first batch I shared/gave away and I have plans to do the same with these.


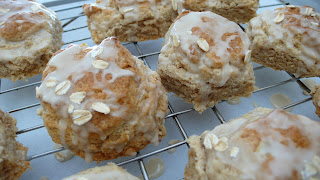
Oat and maple syrup scones have been on my to-bake list. Although I do have another recipe, when I came across this recipe from one of my favorite blogs, Smitten Kitchen, I just knew I had to make them. Mine didn't come out as pretty as Smitten Kitchen's did, so a sweet camouflage of maple syrup and powdered sugar turned them from ugly to pretty tasty.....


Oat and Maple Syrup Scones
recipe taken from the blog Smitten Kitchen but adapted from Breakfast Lunch Tea: The Many Little Meals of Rose Bakery
Makes 10 - 12 scones


1 3/4 cups (260 grams) all-purpose flour, plus extra for dusting surface
1/2 cup (80 grams) whole wheat flour
1/2 cup (35 grams) rolled oats ***Smitten Kitchen used quick-cooking, I used whole rolled oats***
1 very heaped tablespoon baking powder ***My heap looked like 1 tablespoon plus 2 teaspoons***
1 very heaped tablespoon superfine (caster) or granulated sugar
1/2 teaspoon table salt
Scant 3/4 cup (160 grams) cold, unsalted butter, cut into small pieces
1/4 cup maple syrup
1/4 cup milk or buttermilk ***I didn't have either, so I used heavy cream***
1 egg, beaten (for glaze)


Preheat your oven to 400˚F (200˚C). Line a baking sheet with parchment paper or butter a baking tray.


Whisk flours, oats, baking powder, sugar and salt together in a large bowl.


Add your small pieces of butter.


With a pastry blender or your fingertips, work the butter into the dry ingredients until the mixture resembles fine bread crumbs.


In a small bowl, combine milk/buttermilk/heavy cream (whatever you're using) and maple syrup, then add these liquid ingredients to the butter-flour mixture. By hand or with a rubber spatula, bring everything together to form a softish dough. ***Since I used the heavy cream, it needed more liquid. I had to add an additional 2 tablespoons.*** If it feels too dry, add a little more milk but not enough that the dough is sticky. 


On a lightly floured surface, pat or roll the dough out until it is 1 1/4 inches (3 cm) tall/thick. Using a 2-inch (5 cm) cutter, cut the dough into rounds and place them on your prepared baking sheet/tray so that they almost touch. 


***The scones in the pic to the right are spaced out on my baking sheet, not almost touching each other at all. I then moved them closer together after reviewing the recipe.***


Glaze the tops with the beaten egg and bake for 20 to 25 minutes until the scones are lightly golden.


The scones will stick together, so pull them gently apart when they've cooled a bit.
Serve warm.


I thought that these scones were down right ugly, so I mixed up a glaze of 1/3 cup powdered sugar, 2 tablespoons maple syrup, 1 tablespoon heavy cream and a few drops of water. The glaze should have the consistency of heavy cream. Drizzle the maple glaze on top of the warm scones and garnish with a few oats.  

Monday, April 2, 2012

"faux" DOUGH & BATTER baked goods and birthday buddies

For my 50th post, I blogged about my "faux" DOUGH & BATTER baked goods here, but the following pics display them in their sweet environment just perfectly.....


Birthday Buddies!!!


A perfect little something for someone who's turning 1, 2, 3, 4 or 5.....


I'll soon be selling my "faux" DOUGH & BATTER baked goods and Birthday Buddies from my website. But if you need them now or for more information on their contents, please drop me an email at melissa@doughandbatter.com.


***A special shout out and thanks to La Vida Creations Photography for capturing all of these amazing images.***